

How To Install Gusher Guard
Quick Start
You'll first want to make certain you have a decent grasp of the conceptual overview, and then install WireGuard. After that, read onwards here.
Adjacent Video
Before explaining the actual comands in item, it may exist extremely instructive to first watch them being used by ii peers existence configured side by side:
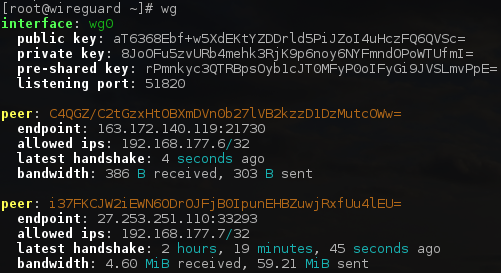
Or individually, a single configuration looks like:

Control-line Interface
A new interface can be added via ip-link(8), which should automatically handle module loading:
# ip link add dev wg0 blazon wireguard (Non-Linux users will instead write wireguard-become wg0.)
An IP address and peer can be assigned with ifconfig(8) or ip-accost(viii)
# ip address add dev wg0 192.168.2.1/24 Or, if there are simply ii peers total, something like this might be more desirable:
# ip address add dev wg0 192.168.ii.1 peer 192.168.2.two The interface tin be configured with keys and peer endpoints with the included wg(8) utility:
# wg setconf wg0 myconfig.conf or
# wg set wg0 mind-port 51820 private-key /path/to/private-key peer ABCDEF... allowed-ips 192.168.88.0/24 endpoint 209.202.254.xiv:8172 Finally, the interface tin can and so exist activated with ifconfig(eight) or ip-link(8):
At that place are also the wg evidence and wg showconf commands, for viewing the current configuration. Calling wg with no arguments defaults to calling wg bear witness on all WireGuard interfaces.
Consult the human page of wg(viii) for more information.
Much of the routine bring-up and tear-down trip the light fantastic of wg(8) and ip(eight) tin be automatic by the included wg-quick(8) tool:

Fundamental Generation
WireGuard requires base64-encoded public and individual keys. These can be generated using the wg(eight) utility:
$ umask 077 $ wg genkey > privatekey This volition create privatekey on stdout containing a new private cardinal.
Y'all tin then derive your public key from your private central:
$ wg pubkey < privatekey > publickey This will read privatekey from stdin and write the corresponding public key to publickey on stdout.
Of course, you tin can practice this all at once:
$ wg genkey | tee privatekey | wg pubkey > publickey NAT and Firewall Traversal Persistence
By default, WireGuard tries to be as silent every bit possible when not being used; it is not a chatty protocol. For the well-nigh part, it only transmits data when a peer wishes to send packets. When it's non being asked to send packets, information technology stops sending packets until information technology is asked again. In the bulk of configurations, this works well. Still, when a peer is behind NAT or a firewall, information technology might wish to be able to receive incoming packets even when it is not sending any packets. Considering NAT and stateful firewalls proceed track of "connections", if a peer behind NAT or a firewall wishes to receive incoming packets, he must keep the NAT/firewall mapping valid, past periodically sending keepalive packets. This is chosen persistent keepalives. When this option is enabled, a keepalive bundle is sent to the server endpoint once every interval seconds. A sensible interval that works with a wide diverseness of firewalls is 25 seconds. Setting it to 0 turns the feature off, which is the default, since most users will not need this, and it makes WireGuard slightly more chatty. This feature may be specified by adding the PersistentKeepalive = field to a peer in the configuration file, or setting persistent-keepalive at the command line. If you don't need this feature, don't enable information technology. But if yous're behind NAT or a firewall and you want to receive incoming connections long subsequently network traffic has gone silent, this option volition keep the "connection" open in the eyes of NAT.
Demo Server
After installing WireGuard, if you'd similar to effort sending some packets through WireGuard, you may use, for testing purposes simply, the script in contrib/ncat-client-server/client.sh.
$ sudo contrib/examples/ncat-customer-server/client.sh This will automatically setup interface wg0, through a very insecure send that is only suitable for demonstration purposes. Y'all tin can and so endeavor loading the hidden website or sending pings:
$ chromium http://192.168.4.i $ ping 192.168.4.1 If you'd like to redirect your internet traffic, you can run it similar this:
$ sudo contrib/examples/ncat-customer-server/customer.sh default-route $ gyre zx2c4.com/ip 163.172.161.0 demo.wireguard.com curl/7.49.1 By connecting to this server, yous acknowledge that you will not use it for any calumniating or illegal purposes and that your traffic may exist monitored.
Debug Info
If you're using the Linux kernel module and your kernel supports dynamic debugging, you can go useful runtime output by enabling dynamic debug for the module:
# modprobe wireguard && echo module wireguard +p > /sys/kernel/debug/dynamic_debug/control If you're using a userspace implementation, set the environment variable export LOG_LEVEL=verbose.

Source: https://www.wireguard.com/quickstart/
Posted by: carmeanexplen90.blogspot.com
0 Response to "How To Install Gusher Guard"
Post a Comment